

A container can be far more useful when the small details are planned around the work happening inside it. A ramp may make equipment easier to move, shelving can preserve floor space, and a better lock setup can help control access. The right choice depends on the container's size, condition, door clearance, site, and intended use.
Shipping container accessories are add-on products that improve access, organization, loading, security, ventilation, or everyday usability without changing the container's main structure. Items such as ramps, shelving hardware, gaskets, lights, lock boxes, and mounting hardware may be removable. While cutting, welding, adding doors or windows, or installing electrical systems is generally a modification that needs separate planning.
That distinction matters for budgeting, compatibility, safety, and local site decisions. Before choosing a product, start by identifying what you need the container to do and whether the solution attaches to the existing unit or alters it. From there, the major accessory categories become easier to compare.
What Counts as Shipping Container Accessories?
Shipping container accessories are add-on products that improve access, organization, security, ventilation, movement, or everyday use without changing the container's basic shell. Some attach with hardware, sit at an opening, or can be removed when your storage needs change.
Examples include lock boxes, ramps, container pads, fork-pocket covers, shelving components, lighting, vents, and mounting hardware.
The important distinction is whether the accessory works with the container as delivered or requires the container itself to be altered. A removable lock box or clip-on shelf is generally an accessory. A new personnel door, window, permanent vent, electrical outlet, or other built-in feature changes the container and should be treated as a modification. Cutting, welding, or adding systems may require local review and professional installation, especially when the work affects structure, weatherproofing, utilities, or intended occupancy.
- Lock boxes, compatible locks, and mounting hardware:
Protect the door hardware and support controlled access. Check lock compatibility, door swing, and installation clearance.
- Ramps, pads, shoes, and fork-pocket covers:
Improve entry, placement, or handling around the container. Review ground conditions, levelness, drainage, and equipment use.
- Shelving brackets, pipe racks, hooks, and organization kits:
Keep tools, materials, and equipment arranged off the floor. Match the system to the container size and distribute stored weight carefully.
- Solar lights, light kits, and removable ventilation products:
Improve visibility and airflow for routine storage use. Confirm the product fit and determine whether installation adds wiring or requires an opening.
Accessory category. | Useful for. | Check before ordering. |
Security hardware. | Controlled access and lock protection. | Lock fit, door swing, and clearance. |
Ramps and placement aids. | Moving carts, equipment, or supplies. | Threshold, grade, ground, and drainage. |
Shelving and organization. | Keeping tools and inventory off the floor. | Unit size, aisle space, and load distribution. |
Lighting and ventilation. | Visibility and airflow during routine use. | Product fit, wiring, openings, and local rules. |
Fit matters as much as the product category. Accessories may be offered for standard and high-cube containers, and a component sized for a 20-foot unit may not suit a 40-foot unit. Confirm the container's length, height, door configuration, condition, and intended use before selecting hardware. A used container may also need an inspection of its doors, floors, roof, seals, and weatherproofing before accessories are added.
Removable does not mean planning is unnecessary. A shelf, ramp, or bracket can still affect clearances, stored weight, door access, and how people move around the unit. Think about whether the accessory will be used seasonally, whether it must stay in place during delivery, and whether it could create a trip or pinch point. These details are especially useful when a container will support a job site, farm, workshop, or business inventory.
For a project that needs built-in access, windows, ventilation, power, or another permanent change, review modified shipping container options instead of treating the work as a simple add-on. That distinction helps you plan the right product, installation approach, and local site questions from the start.
Access and Entry Accessories for Daily Use
Access accessories can make a shipping container easier to open, enter, load, and use throughout the week. Common options include ramps, door hardware, replacement gaskets, handles, thresholds, and lighting near the entry. The right combination depends on the container's condition, the people and equipment using it, and the space available around the doors.
Start with the existing door operation. A container door needs enough room to swing without striking a wall, fence, vehicle, stored materials, or another container. Check both the travel path and the area where someone will stand while opening or closing it. Door edges, hinges, ramps, and thresholds can create pinch points, especially when a second person is helping move equipment. Keep the approach clear, use a stable walking surface, and do not assume a door that opens today will remain convenient after shelving or other accessories are added.
Ramps can help bridge the height difference between the ground and the container floor for carts, hand trucks, and routine foot traffic. Rubber ramps are one listed accessory category, but the ramp still needs to match the entry, sit securely, and work with the ground conditions at the site. A threshold or transition piece can reduce a trip point, but it should not interfere with the door seal or prevent the doors from closing fully. Drainage and levelness also matter because standing water can affect the approach and accelerate wear.
Door hardware deserves the same careful fit check. Replacement handles, locking components, and compatible hardware may improve daily operation when the original parts are worn. A gasket designed for the correct container format helps maintain the weather seal around the doors. Door gaskets are listed for both standard and high-cube containers, so confirm the unit type before ordering. Also check lock compatibility. A padlock, lock box, or other security device must work with the door hardware and leave the door able to close and seal as intended.
Lighting near the entry can make early-morning or evening access more practical. A removable light or accessory-mounted fixture may suit a basic storage use, while powered lighting can require a more involved installation. If the plan includes cutting a new opening, welding, permanent door hardware. Or adding electrical systems, that is a container modification rather than a simple replacement or add-on accessory. For more background, review shipping container doors and windows.
Mann's Cans supplies new and used 20-foot and 40-foot containers in standard and high-cube formats. Accessory fit can vary across those sizes and formats, so identify the exact unit before selecting a ramp, gasket, handle, threshold, or entry light. Inspect door operation, seals, and weatherproofing first, then discuss clearance, pinch points, lock compatibility, and the intended installation with a qualified supplier.
Organization Accessories That Make Container Storage Easier
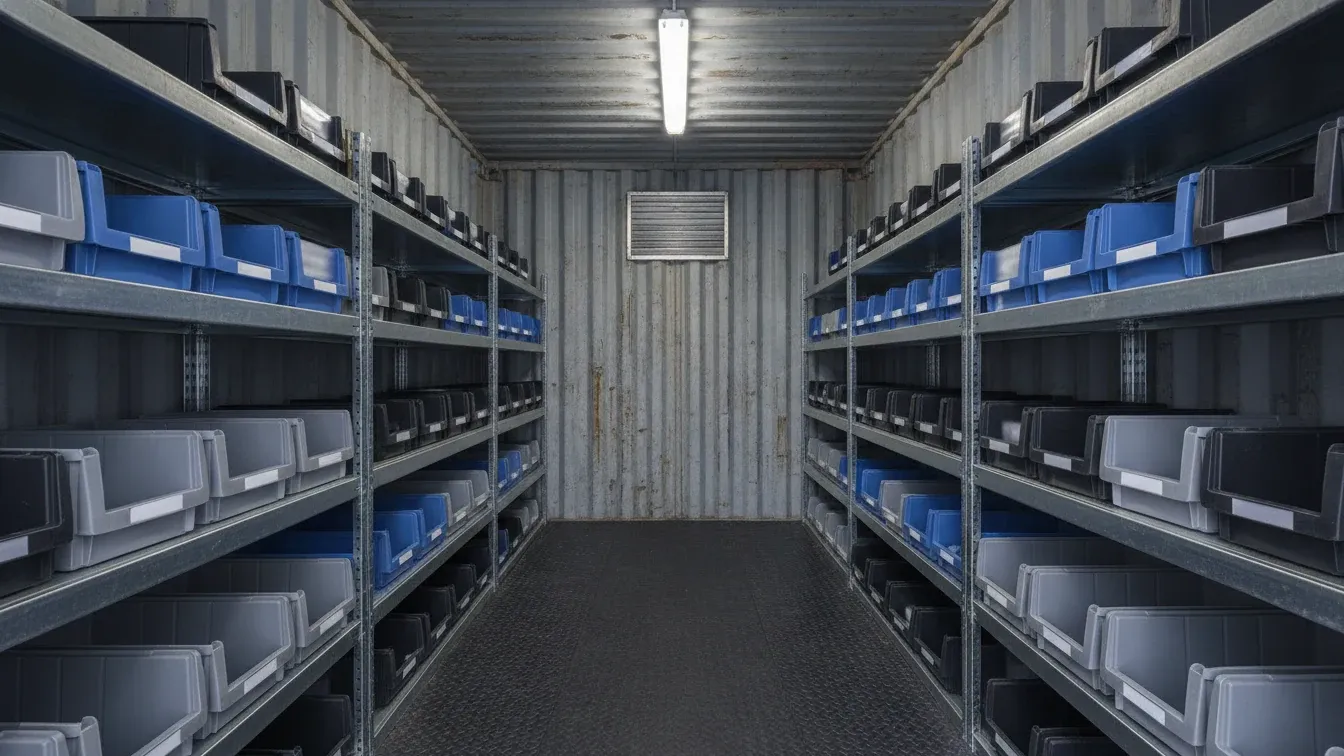
A container can hold a lot, but loose tools, materials, and equipment quickly turn a narrow interior into a difficult space to use. Organization accessories help you separate items, keep frequently used supplies within reach, and preserve a clear route from the doors to the back wall. The right setup depends on the container size, its condition, and what you plan to store.
Shelving brackets and pipe racks are common starting points. Brackets can support shelves for bins, hand tools, hardware, or boxed inventory, while pipe-rack systems can keep long materials together instead of leaving them across the floor. Bolt-on and clip-on shelving systems offer another way to add storage without treating every improvement as a permanent structural change. Before choosing a system, confirm that it fits the container and understand whether installation requires drilling, welding, or another modification.
Magnetic hooks are useful for lighter items that need to stay visible, such as extension cords, work gloves, small hand tools, or cleaning supplies. They can make use of the container walls while leaving the floor open. However, a magnetic attachment is not automatically appropriate for every load or surface. Check the product instructions, the condition of the wall, and the item being hung. Do not assume a hook or bracket has a load rating that has not been provided.
Bins can make shelves easier to manage, especially when several people use the container or when small parts would otherwise become mixed together. Label bins by task or material, and place the most frequently accessed items near the doors. Keep heavier items low and distribute stored weight across the available shelving rather than concentrating it in one small area. Load distribution helps reduce unnecessary stress on storage components and keeps the container more predictable to work in.
Protect aisle access as carefully as you plan shelf capacity. Leave enough room to open both doors as intended, move safely around stored items, and reach the rear of the container without climbing over supplies. Avoid placing shelves where they interfere with door swing, locking hardware, or a clear exit path. Keeping a usable center aisle may mean using narrower shelves or storing long materials along one side instead of filling every available inch.
Lighting is another organization tool, not just a convenience. Solar-powered interior lights and light kits are listed options for container interiors, and a bracketed fixture can help illuminate shelves or work areas. Position lighting so it does not create a snag point or block access. If your plan requires permanent wiring, outlets, or other added systems, treat that work as a modification and evaluate it separately from removable accessories.
Before attaching shelving, racks, hooks, or lights, inspect the container. Check the floor, roof and weatherproofing, door seals, ventilation, moisture, pests, rust, and the condition of the intended mounting area. A used container may need condition work before it is ready for an organization system. For more ideas about practical improvements, see how to upgrade an existing container. A thoughtful layout should match the container and the work, not simply maximize the number of accessories.
Loading, Movement, and Placement Accessories
Loading and placement accessories should be selected around the container, the delivery method, and the ground where the unit will sit. A rubber ramp can help bridge a threshold for carts or equipment, while lifters, wheels, or jacks may support a particular handling plan. Pads or container shoes can help create a more deliberate bearing point at the placement area. Fork-pocket covers are another listed accessory for container hardware and handling. These products are not interchangeable, and none should be treated as a substitute for a site assessment or qualified lifting plan.
Start with the movement problem. Is the accessory intended to load a hand truck, position an empty unit. Protect a fork pocket when it is not in use, or support placement on a prepared pad? Confirm that the product fits the container size and hardware, and review the container's condition before adding equipment. A used container may need attention to its floor, corners, pockets, or other load-bearing areas. For background on the container itself, see shipping container load capacity. That guide can help frame the difference between cargo planning and the separate requirements of lifting or moving the container.
Delivery access is part of the accessory decision. Map the route from the public road to the final position, including turns, slopes, overhead utilities, branches, gates, and other obstacles. Tilt-bed delivery generally needs 100+ feet of straight clearance, but the actual site still needs to be reviewed for the truck, the container, and the planned placement sequence. Wheels, jacks, lifters, ramps, or pads do not eliminate the need to check ground conditions. Soft, uneven, or sloped ground can change how equipment behaves. Plan for levelness, drainage, and a stable prepared area, such as a suitable gravel pad or concrete-block layout when appropriate to the site and container.
Weight information must be confirmed before any hoisting activity. OSHA 1918.85 addresses permanent container markings for empty weight, maximum cargo weight, and combined maximum weight. It also requires the actual gross weight of a loaded container, or an equivalent recorded weight display, to be plainly marked and visible before the container is hoisted. Do not estimate the gross weight from a partial inventory. Verify the current cargo and container information with the responsible operator before lifting.
Use only lifting and anchoring hardware appropriate to the operation. Twist locks and container nuts are listed as anchoring or mounting products, but compatibility, installation, and the force path still need review. For custom-designed lifting accessories, OSHA guidance on lifting accessories explains that safe working loads must be marked and the accessories must be proof-tested to 125 percent of their rated load before use. That requirement is not an engineering approval for a specific setup. Follow the accessory manufacturer's instructions and use qualified personnel where lifting is involved.
Keep people clear of pinch points at corners, pockets, ramps, wheels, jacks, and landing areas.
Check door swing, walking surfaces, drainage, and the route after placement, not only before delivery.
Confirm anchors or mounting points will not interfere with utilities, access, or future movement.
In Pittsburgh-area projects, local zoning, permits, utilities, and site conditions may affect the final plan. Discuss the container size, condition, accessories, route, clearance, and placement area before ordering or installing equipment.
Security Accessories for a Better-Prepared Container
A shipping container can support a useful security plan, but no single accessory guarantees protection against theft or unauthorized entry. Start with the existing door hardware, the contents, how often people need access, and the site conditions. A job site, farm, renovation property, or commercial storage area may need a different combination of hardware and access routines.
Protect the lock area with a lock box
A lock box shields the padlock area from some direct exposure and can make the shackle harder to reach or manipulate. Lock boxes are common shipping container security accessories, but the right model depends on the door hasp, handle arrangement, and clearance. Confirm that it fits the existing hardware and that authorized users can operate it without awkward hand positions or pinch points.
The lock must match the box and the way the container is used. Consider shackle clearance, weather exposure, key control, and the number of users. Keep a keyholder list or another approved access record when several people need entry. Review door seals and locking mechanisms too, since an accessory does not correct damaged hardware or a door that will not close properly.
For a deeper look at hardware choices and practical safeguards, read our guide to shipping container security locks.
Add visibility and site control
A camera bracket can provide a mounting point for monitoring equipment aimed at the doors, approach, or another priority area. Check the mounting location, field of view, power or battery needs, network coverage, and weather exposure. Avoid placing equipment where the open door, stored materials, or vehicle movement blocks the view.
Practical access control means deciding who should enter, how keys or codes are issued, and how access changes when a contractor or employee leaves. Keep an authorized-user record, check the door swing, and use lighting or site visibility where appropriate. These steps help hardware work as part of a repeatable routine.
Use anchors and twist locks for the right application
Twist locks and container anchors are mounting or anchoring hardware. They may be relevant when a container must be restrained or connected to a prepared site, but they are not interchangeable with a door lock. Selection depends on the corner fittings, receiving surface, expected forces, and intended use. Follow product instructions and obtain qualified guidance for lifting, structural restraint, or unusual site conditions.
Before installing any security accessory, assess clearance, overhead obstacles, level ground, drainage, load limits, door swing, pinch points, and lock compatibility. Cutting, welding, adding electrical systems, or making other permanent changes turns the project into a modification rather than a simple add-on. Local zoning, permits, utilities, and site rules may also affect what is appropriate. Discuss the container size, condition, delivery site, and security objective before choosing hardware.
Ventilation, Moisture, and Interior Usability
A shipping container can be weather-resistant without being a finished room. Door gaskets, ventilation, and practical lighting all affect whether the interior stays usable for storage, tools, equipment, or project materials. Start by checking the container's existing door seals, roof, floor, and weatherproofing. Door gaskets are available for both standard and high-cube containers, but the replacement must match the door and container configuration. A worn or poorly fitted gasket can undermine otherwise sound weather protection.
Ventilation deserves equal attention. Louvered gable vents and solar roof vents are examples of products marketed for container use. Their purpose is to support air exchange, which can help manage heat and moisture inside a closed steel box. Solar-powered interior lights and fan-shaped solar lights can also improve visibility and everyday usability without immediately requiring a hardwired electrical system. They are useful options to discuss when the container is mainly used for access and storage rather than as a continuously occupied space.
Airflow is not a substitute for inspection or site planning. Condensation can still develop when warm, moist air meets cooler metal surfaces, especially when the container is opened frequently, stored items carry moisture, or ventilation is limited. Keep stored materials from blocking vents, watch for dampness and pests, and inspect the roof, door seals, floor boards, and other weatherproofing points over time. Drainage and the placement of the container also matter. A level, properly prepared site can help support consistent door operation and reduce avoidable moisture problems. But no accessory guarantees a dry interior in every season or use case.
Be clear about the difference between an add-on product and a modification. A removable light, fan, or compatible vent product may be an accessory. While cutting an opening, permanently installing a vent, or adding outlets and wiring changes the container itself. Mann's Cans identifies permanent vents and basic electrical outlets as modifications rather than ordinary accessories. If your plan includes switches, outlets, fixed lighting, or other powered systems, review the installation with a qualified professional and check applicable local requirements before work begins. The guide to shipping container electrical wiring provides a useful starting point, but it does not replace project-specific electrical or code guidance.
Before selecting ventilation or lighting, describe the intended use, container size and condition, installation method, and site. That information helps separate a simple usability accessory from work that needs professional review and local planning.
How to Choose Accessories for Your Container and Site
Start with the job the container must do, not with a product list. Storage for household items may call for shelving, hooks, lighting, and weather management. A contractor may need ramps, lifting or handling equipment, security hardware, and clear access for tools. A farm, retailer, or small business may need a different combination. Write down what must enter the container, how often it will be accessed, and whether people, carts, vehicles, or equipment need to move through the opening.
- Match the accessory to the use case.
Separate daily-use items from occasional loading equipment. An accessory that saves floor space may be useful for organized storage. While a ramp or handling aid may matter more when heavy or wheeled items move in and out. If the project needs a permanent door, window, vent, outlet, or other added system, treat it as a modification rather than an ordinary removable accessory.
- Confirm the container size and condition.
Mann's Cans offers new and used 20-foot and 40-foot standard and high-cube options. The unit's dimensions, door arrangement, interior condition, floor, roof, seals, and locking hardware all affect the right choice. Used containers may have condition differences that matter before installing shelving, gaskets, lighting, or security hardware. Discuss the intended use and inspect the existing container instead of assuming every accessory fits every unit.
- Check compatibility before ordering.
Verify whether the accessory is designed for a 20-foot or 40-foot container and for a standard or high-cube profile. Check door clearance, threshold height, wall or corner attachment points, aisle width, and whether the accessory is bolt-on, clip-on, magnetic, or intended to be installed. Compatibility also includes the lock, ramp, lift, bracket, or mounting hardware used with it.
- Plan loads and safe working conditions.
Keep stored weight distributed as intended and preserve access to doors and aisles. Review the container's marked weights and the accessory's stated limits. For lifting or hoisting, actual gross weight, rated safe working loads, and suitable equipment matter. Account for pinch points, door swing, overhead obstacles, uneven ground, drainage, and the way people will use the setup. When the plan involves custom lifting or structural work, use qualified professionals and follow applicable requirements.
- Work backward from delivery and placement.
Before selecting pads, ramps, anchors, wheels, or other placement accessories, review the route, turning space, overhead utilities, obstacles, ground, levelness, and drainage. Tilt-bed delivery generally needs 100 or more feet of straight clearance. A gravel pad or concrete blocks may be part of site preparation, but the appropriate approach depends on the location and container use.
Check local rules and installation needs.
Zoning, permits, utilities, and site conditions can vary across Pittsburgh, Westmoreland County, and Washington County. Ask what must be installed by a qualified professional and whether cutting, welding, electrical work, or an added ventilation system changes the project scope. For a practical starting point, review
, then
with the size, condition, route, placement, and accessory details.
Frequently Asked Questions About Shipping Container Accessories
What should you not put in a shipping container?
Avoid placing items that can create a fire, moisture, pest, chemical, or structural concern unless the container and site are specifically prepared for them. Perishables, hazardous materials, damp items, and loads that exceed the container or storage system's limits need special evaluation. Leave room for door operation and safe access, and check applicable local requirements for your intended use. Use sealed, stable storage only after evaluating the material and the environment.
How can you make a shipping container look nice?
Start with a clean, weather-protected exterior and an organized interior. Useful improvements can include shelving, hooks, lighting, a suitable entry ramp, and coordinated site preparation. Exterior paint or branding, windows, doors, vents, and electrical work may require a modification rather than a simple accessory. Choose finishes and additions that suit the container's condition, location, and intended use. Keep walkways clear so the improvements support the way the container is used.
Can a tornado pick up a 40-foot shipping container?
Wind performance depends on the container's condition, empty or loaded weight, placement, ground conditions, anchoring, surrounding exposure, and the severity of the storm. Do not assume that size alone makes a container secure. Discuss anchoring or mounting with a qualified professional, review local conditions, and keep people away from the site during dangerous weather. A site review should include the container base, anchors, and nearby structures.
How much should I pay for a 20-foot shipping container?
There is no single useful figure for every 20-foot container. The total can vary with new or used condition, standard or high-cube configuration, inspection findings, delivery route, placement difficulty, and accessory or modification needs. Compare the complete project rather than a unit alone. Ask Mann's Cans for a current quote based on your container, site, and intended use. Delivery and placement can also affect the overall project scope.
Plan Your Container Setup
The right shipping container accessories depend on more than the product name. Share whether you need a new or used container, the size and condition you are considering, the route to the property, and where it will be placed. Those details help identify clearance, ground, access, and drainage questions before delivery.
It is also useful to list the accessory or modification needs, such as shelving, ramps, security hardware, ventilation, lighting, doors, or electrical work. Mann's Cans can help you separate removable accessories from work that needs a more detailed installation plan.


Comments