

Updated: Sep 15
A backyard greenhouse is not just a sunny room for plants. It is a controlled environment where light, airflow, moisture, and temperature all need to work together. That balance becomes especially important when the starting structure is a steel shipping container.
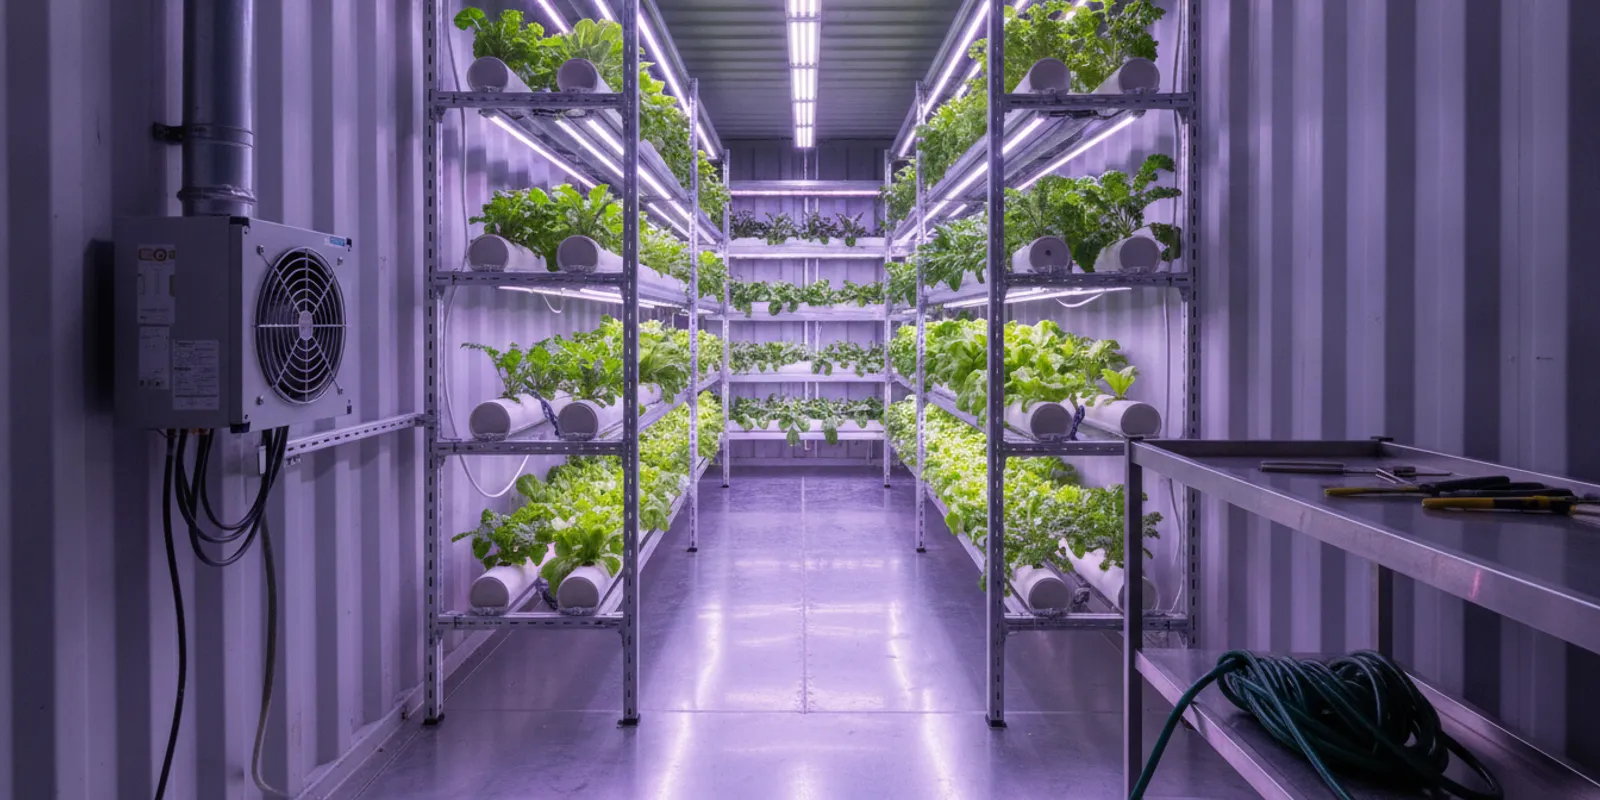
A shipping container greenhouse can be a secure, budget-conscious option when you plan for adequate lighting, strong ventilation, reflective interior surfaces, drainage, and seasonal climate control. The container shell may provide a practical foundation, but converting an opaque box into a productive growing space requires thoughtful modifications and realistic cost planning.
The result can suit a hobby grower or a property owner who values security and a compact footprint. But it will not offer the natural light of a traditional glass greenhouse without added work. Before comparing materials and systems, it helps to understand what makes a container conversion worthwhile in the first place, including the trade-offs created by its durable steel shell.
Contact Mann's Cans for a container greenhouse consultation to talk through a custom build.
Why Build a Greenhouse From a Shipping Container
A shipping container gives you a strong starting shell for a controlled growing space. Its steel construction provides durability, security, and protection from ordinary outdoor exposure, provided the container is placed on a properly prepared, level foundation and maintained over time. That can be useful for backyard growers who want more than a lightweight seasonal structure.
The enclosed design also makes it easier to plan a consistent growing environment. With the right combination of insulation, ventilation, lighting, and heating or cooling, you can manage the conditions plants need instead of relying entirely on changing weather. Climate control is especially important if your goal is to extend the growing season into colder months. It does not make the space maintenance-free, but it gives you a practical framework for managing temperature and airflow.
Available footprints add flexibility. A 20-foot container can work where a larger structure would crowd a small lot, while a 40-foot container offers more room for benches, storage, and separate growing zones. Either option can be adapted to fit the property and the type of plants you want to grow. In the Pittsburgh area, careful site preparation matters because uneven terrain can complicate delivery, leveling, drainage, and daily access.
For a hobbyist who can handle some of the work, the project may be cost-effective compared with a custom glass structure. The savings depend on the container price and the modifications required, so DIY-friendly does not mean simple. Cutting openings, adding utilities, and building reliable climate controls require planning and, in some cases, skilled help. Review shipping container modification options before deciding which work belongs in your own build plan.
How Much Does a Shipping Container Greenhouse Cost to Build?
The cost depends less on the steel box alone than on what you need the finished growing space to do. A basic modified shell may start around $9,700, while a fully automated turnkey hydroponic system can exceed $40,000. Treat those figures as broad industry estimates, not Mann's Cans pricing. Your total will vary with container availability, the size of the build, equipment choices, and whether you handle the work yourself or hire specialists.
Start with the container and site
The container is the starting point, not the complete greenhouse. A 20-foot unit may suit a smaller growing operation, while a 40-foot unit offers more room for beds, aisles, equipment, and work areas. The condition, age, and delivery distance can all affect the container cost. You should also budget for a level, well-drained foundation or pad and delivery placement. Difficult access or uneven Pittsburgh-area terrain can add site-preparation and equipment costs before modification begins.
Budget for the growing environment
Because a container is naturally opaque, creating useful growing conditions requires substantial modification. Window, door, or roof openings can add fabrication, framing, and glazing costs. Cutting into the steel also requires careful planning and reinforcement because the walls are load-bearing components. These are code considerations, so have the design reviewed locally before work begins.
Insulation is another major line item. It helps stabilize temperatures, but the material and installation method affect both cost and usable interior space. Plan separately for ventilation, fans, thermostats, and possibly heating or cooling. Proper ventilation is central to greenhouse climate control, not an optional finishing touch. A purpose-built ventilation system for a container greenhouse may cost more initially, but it supports healthier airflow and temperature management.
Lighting can become one of the largest equipment expenses, especially when the design relies heavily on LED grow lights rather than direct sunlight. Electrical upgrades, panels, outlets, controls, and professional installation should be included in the estimate. Finally, allow for drainage, waterproofing details, floor protection, and rust prevention. Constant moisture can damage steel, so a low-cost build that ignores water management may create larger repair costs later.
DIY work versus hired labor
DIY labor can reduce the initial bill if you have the skills, tools, and time for framing, painting, plumbing, and finish work. It does not remove material, delivery, electrical, engineering, or permitting-related costs. Hiring experienced fabricators may raise the upfront investment while reducing mistakes in structural openings, insulation, wiring, and climate controls. Ask for a detailed scope that separates the container, site work, modifications, equipment, and labor. That makes it easier to compare a simple modified shell with a complete growing system and decide which features belong in phase one.
Bringing Light Into a Container Greenhouse and Reflecting It
A standard shipping container starts with one major greenhouse disadvantage: its steel shell is naturally opaque. Unlike a traditional greenhouse, it does not admit useful sunlight through its walls or roof. Turning that enclosed box into a productive growing space therefore requires deliberate openings and thoughtful interior finishes. The goal is not simply to cut holes, but to create enough evenly distributed light for the plants you plan to grow while preserving a practical, manageable structure.
Windows are the most straightforward way to add daylight along the long sides of the container. Place them where nearby buildings, fences, or trees will not shade them for much of the day. Doors with glazed panels can contribute light while maintaining a usable access point. A properly designed skylight or roof opening can bring light into the center of a deeper container, although it needs careful waterproofing and structural planning. Any new opening in the steel should be framed and reinforced by someone who understands container modifications. For more planning considerations, see this guide to installing windows for proper greenhouse light.
Orientation matters as well. Before choosing window locations, observe the seasonal path of the sun and identify the hours when the site receives direct light. A south-facing exposure may be useful in many northern locations, but surrounding structures and seasonal shadows still determine actual performance. Local conditions in Pittsburgh can change considerably between an open lot and a shaded urban backyard.
Once daylight enters, improve its reach with a bright interior. White or reflective interior paint helps bounce limited sunlight across the growing area instead of allowing dark steel surfaces to absorb it. Use a finish suited to humid conditions, prepare the metal correctly, and maintain it as moisture and wear affect coverage. Even with these measures, natural light inside a shipping container greenhouse will usually be more limited and less uniform than in a purpose-built glass or polycarbonate greenhouse. Supplemental grow lights may be needed for cloudy periods, shade-prone sites, or crops with higher light demands.
Ventilation: The Foundation of Container Greenhouse Climate Control
A steel container can become dangerously hot soon after direct sun reaches its walls and roof. Once plants, wet growing media, and people add heat and humidity, a closed interior may drift far outside a healthy growing range. That is why the University of Minnesota Extension calls ventilation the most important factor in greenhouse climate control. Air exchange removes excess heat, reduces stagnant humidity, and helps keep foliage dry enough to limit common disease pressure.
For a shipping container greenhouse, proper ventilation starts with a plan rather than a single fan added after the build. Treat every opening as part of an airflow system, and consider how the sun, prevailing breeze, plants, shelving, and equipment will affect circulation.
Active ventilation with fans
Exhaust fans provide predictable air movement when outdoor conditions are still or the greenhouse needs rapid cooling. Place an exhaust fan high on one end or side, where rising hot air collects. Pair it with a screened intake opening lower down and on the opposite side. This arrangement pulls cooler replacement air across the growing area instead of recirculating the hottest air near the ceiling. A thermostat or temperature controller can turn the fan on before heat stress becomes visible.
Internal circulation fans serve a different purpose. They keep air moving around leaves and corners, which helps reduce pockets of humidity, but they do not replace an exhaust fan or fresh-air intake. Protect electrical components from irrigation spray, and size equipment for the container volume and local conditions.
Passive openings and practical layout
Louvered vents, roof vents, operable windows, and screened doors can release hot air without continuous power. High openings work with the natural rise of warm air, while lower openings provide a path for incoming air. Use insect screening where appropriate, and make sure shelving does not block the intake-to-exhaust path.
Ventilation will not solve every summer heat problem. Shade, insulation, irrigation timing, and supplemental cooling may also be necessary, especially during Pittsburgh-area heat waves. Test the system on a sunny day, check temperatures at plant height and near the ceiling. And adjust the opening locations or controls before relying on it for a full growing season.
Insulating Your Container Greenhouse for All Four Seasons
A steel container can absorb outdoor temperature changes quickly, so insulation is central to keeping the growing environment manageable. Insulate the interior shell after addressing air sealing, wiring, and any planned openings. Spray foam, rigid board, or another suitable system can help reduce heat transfer through the walls and ceiling. But the best material and installation method depend on moisture levels, interior finishes, and how the space will be used. For a closer look at the process, see our guide to insulating your container for climate control.
Insulation is not a substitute for a complete climate plan. It slows heat loss in winter and helps limit heat entering through the steel during warm weather. But transparent panels, doors, fans, and outdoor exposure still affect the interior temperature. Seal gaps around openings carefully while preserving the ventilation needed to control humidity and protect plants from stagnant air.
Winter: hold heat without blocking needed light
In cold weather, combine insulation with a reliable heat source, temperature monitoring, and sensible placement. Passive solar design can improve performance when the container is oriented and operated to use available sun, while thermal mass stores some heat and releases it later. The National Renewable Energy Laboratory describes passive solar greenhouse design as an approach that integrates the building and site for more efficient space heating. These measures may reduce heating demand, but they do not make winter growing cost-free. Short days, freezing temperatures, and the needs of individual crops still determine whether supplemental heat and grow lighting are necessary.
Summer: prevent the insulated box from overheating
Insulation can slow heat gain, but it cannot remove heat that has already accumulated. Plan for summer conditions with high and low vents, exhaust fans, and shade over the most exposed glazing. Openings should support crossflow rather than simply moving hot air around inside the container. Monitor temperature and humidity during sunny afternoons, especially in a Pittsburgh summer when weather can shift quickly. If the space becomes too hot, plants may suffer even when the soil has adequate moisture.
Climate control, including both heating and cooling, is what makes a longer growing season more realistic. It extends the usable window, rather than guaranteeing that every crop will thrive in every month. Build the system around the plants you actually intend to grow, then size insulation, ventilation, shade, and equipment accordingly.
Drainage, Moisture, and Keeping the Steel Healthy
A greenhouse environment is humid by design. Watering, wet growing media, and temperature changes can all add moisture to the air and surfaces inside a shipping container greenhouse. If that moisture collects against the steel or remains on the floor, it can create avoidable maintenance problems. Steel containers are prone to rust when exposed to constant moisture, so drainage is part of the greenhouse design, not an afterthought.
Start with the site and floor. Set the container on a properly prepared foundation that keeps it out of standing water. And make sure the surrounding ground sheds rain away from the doors and walls. The interior floor should not allow irrigation water to pool. Depending on the growing setup, that may mean using raised benches, slatted flooring, floor drains, or a deliberately planned slope toward a controlled drainage point. Any drain should discharge safely away from the container and comply with applicable local requirements.
Drip trays beneath pots and benches catch runoff before it reaches the steel floor. They also make it easier to identify leaks, overwatering, or clogged irrigation lines. Keep walkways clear and wipe up persistent spills rather than allowing damp areas to sit overnight.
Humidity control matters as much as surface drainage. Use the ventilation plan to exchange damp air, and monitor condensation on the roof, walls, and around modified openings. Fans, timed watering, shade, and dehumidification may all have a role, depending on the crops and climate. Insulating the container can also reduce cold surfaces where warm, humid air turns into condensation.
Inspect the roof, seams, doors, vents, and cut edges regularly. Touch up damaged protective coatings with a product appropriate for steel, and address small rust spots before they spread. A well-designed moisture and drainage plan will not eliminate maintenance, but it can keep routine upkeep manageable and help preserve the container shell.
Modifications and Code Considerations Before You Cut Steel
Before modifying a container, treat every opening and service connection as a code consideration, not simply a DIY cut. Container walls contribute to the strength of the structure, so cutting steel for windows, doors, vents, or equipment can affect structural integrity. Careful planning and appropriate reinforcement are essential when changing the shell.
Plan Reinforcement Around Openings
Door and window openings should be laid out before fabrication begins. The finished opening may need a welded steel frame or other reinforcement so the remaining structure can carry loads as intended. The size, location, and number of openings all matter. A qualified fabricator or contractor can help determine how the changes should be supported instead of treating each cut as an isolated project.
Foundation and leveling are also code considerations. A container greenhouse needs a stable, well-drained base that keeps the unit level and limits standing water. Review shipping container foundation options before choosing a slab, pier, or gravel approach. Local soil, drainage, access, and site conditions can change what is appropriate.
Handle Electrical Work as a Safety Issue
Fans, pumps, sensors, heaters, and grow lights introduce electrical requirements into a damp environment. Plan wiring routes, outlets, switches, grounding, and protection against moisture before equipment is installed. Keep electrical components away from splash zones, and have the work reviewed or completed by a qualified professional where required. Our guide to wiring grow lights and power safely provides a useful starting point, but it does not replace local requirements or professional advice.
Finally, check local zoning rules, setbacks, permits, and inspection requirements before fabrication or delivery. Requirements vary by municipality and by how the container is placed and used. Confirm the applicable rules with your local authority rather than assuming a greenhouse is exempt. Resolving those code considerations early can prevent expensive changes after the steel has been cut.
Shipping Container Greenhouse vs Traditional Greenhouse
Neither design is automatically better for every grower. A traditional glass or framed greenhouse is built around transparent walls and a roof. While a container starts with an opaque steel shell that must be modified for growing conditions. That fundamental difference shapes the trade-offs in the table below.
Consideration | Shipping container greenhouse | Traditional glass or frame greenhouse |
Durability and security | Steel provides a sturdy shell and better resistance to casual intrusion. It still needs moisture control, rust prevention, and routine inspection. | Glass and lightweight framing can be more vulnerable to impact, weather, and unauthorized access unless upgraded or secured. |
Natural light | Limited at the start because containers are naturally opaque. Windows, roof openings, grow lights, and reflective interior finishes require careful planning to bring in and distribute usable daylight. | Wins for natural light because transparent walls and roofing are part of the original design. |
Climate control | Can offer a more enclosed, uniform environment for ventilation, insulation, heating, and cooling, provided those systems are sized correctly. | Natural light is strong, but heat can build quickly. Airflow, shade, and temperature controls remain essential. The University of Minnesota calls ventilation the most important factor in greenhouse climate control. |
Cost | May be cost-effective when the container is sourced affordably and modifications are completed efficiently. Costs rise with structural openings, insulation, lighting, and mechanical systems. | Can be less expensive for a simple kit, but custom glass, framing, foundation, and climate systems can increase the total. |
Setup and site preparation | Needs a level, stable base and planning for delivery, drainage, openings, and utilities. Steel cutting may require reinforcement and local code review. | Often needs a prepared base and assembly on site, with framing and glazing completed after delivery. |
Aesthetics | Has an industrial appearance that suits some properties, but may need cladding, paint, or landscaping to blend in. | Usually wins for a classic garden look and greater visual connection to the surrounding landscape. |
Maintenance | Requires inspection of seals, coatings, drainage, ventilation, and any modified steel. | Requires cleaning glazing and checking panels, framing, seals, and vents for damage or wear. |
Choose a container when durability, security, and a tightly managed growing environment matter more than abundant daylight or a traditional appearance. Choose a conventional greenhouse when passive sunlight, open views, and garden aesthetics are the priority.
In either case, the real budget depends on the shell or kit, site work, utilities, and how much climate-control equipment the plants require. A container is not a shortcut around design work, but it can provide a strong starting structure for a carefully planned greenhouse.
Get a custom quote on a shipping container greenhouse from the Mann's Cans team.
Frequently Asked Questions
Can you turn a shipping container into a greenhouse?
Yes. A standard container can be converted into a controlled growing space, but it is naturally opaque. So it needs planned openings, supplemental grow lighting, ventilation, insulation, and moisture management. The steel shell provides a secure base, while the interior systems determine whether plants receive the light, airflow, and temperature control they need.
How much does a shipping container greenhouse cost?
Costs vary widely with the container, site work, electrical service, insulation, lights, fans, drainage, and how much labor you hire. Published estimates place basic modified shells around $9,700, while fully automated hydroponic systems can exceed $40,000, so treat those figures as broad planning references rather than a quote.
What modifications are needed for a shipping container greenhouse?
Most builds need an insulated interior, LED grow lights, electrical planning, intake and exhaust ventilation, reflective white finishes, drainage, and climate controls for heating or cooling. Cutting openings into the steel can affect structural integrity and may require reinforcement. Treat wiring, structural changes, zoning, and permits as local code considerations, and consult qualified professionals before work begins.
Can it support year-round growing?
It can extend the growing season, but year-round production depends on maintaining suitable light, temperature, humidity, and airflow. Insulation and passive solar design can reduce heating demand, while fans, shade, cooling, and supplemental lighting may be necessary during warm or dark periods. A container greenhouse is a controlled environment, not a guarantee of free growing through every season.
Is it better than a traditional greenhouse?
Neither option is better for every property. A container offers security, a durable shell, and tighter control over the growing environment. A traditional glass or polycarbonate greenhouse generally provides more natural light and a familiar appearance. Choose based on your budget, site, desired crops, utility access, maintenance expectations, and whether security or open sunlight matters most.
Ready to Plan Your Container Greenhouse?
A successful shipping container greenhouse depends on thoughtful planning for light, airflow, insulation, drainage, and the right level of automation. Mann's Cans can help you talk through the practical options for a custom build that fits your property and growing goals. To get started, contact Mann's Cans for a greenhouse consultation and share what you want to grow, where the container will go, and which features matter most.


Comments